It’s amazing to me how much a child can grow in a year. It seems like just last year Evie and I (mostly me) were making her first mailbox for Valentine’s Day. This year was special because Evie took a much more active role in designing and creating her box. This year Evie decided that she wanted a dinosaur Valentine’s Day mailbox.
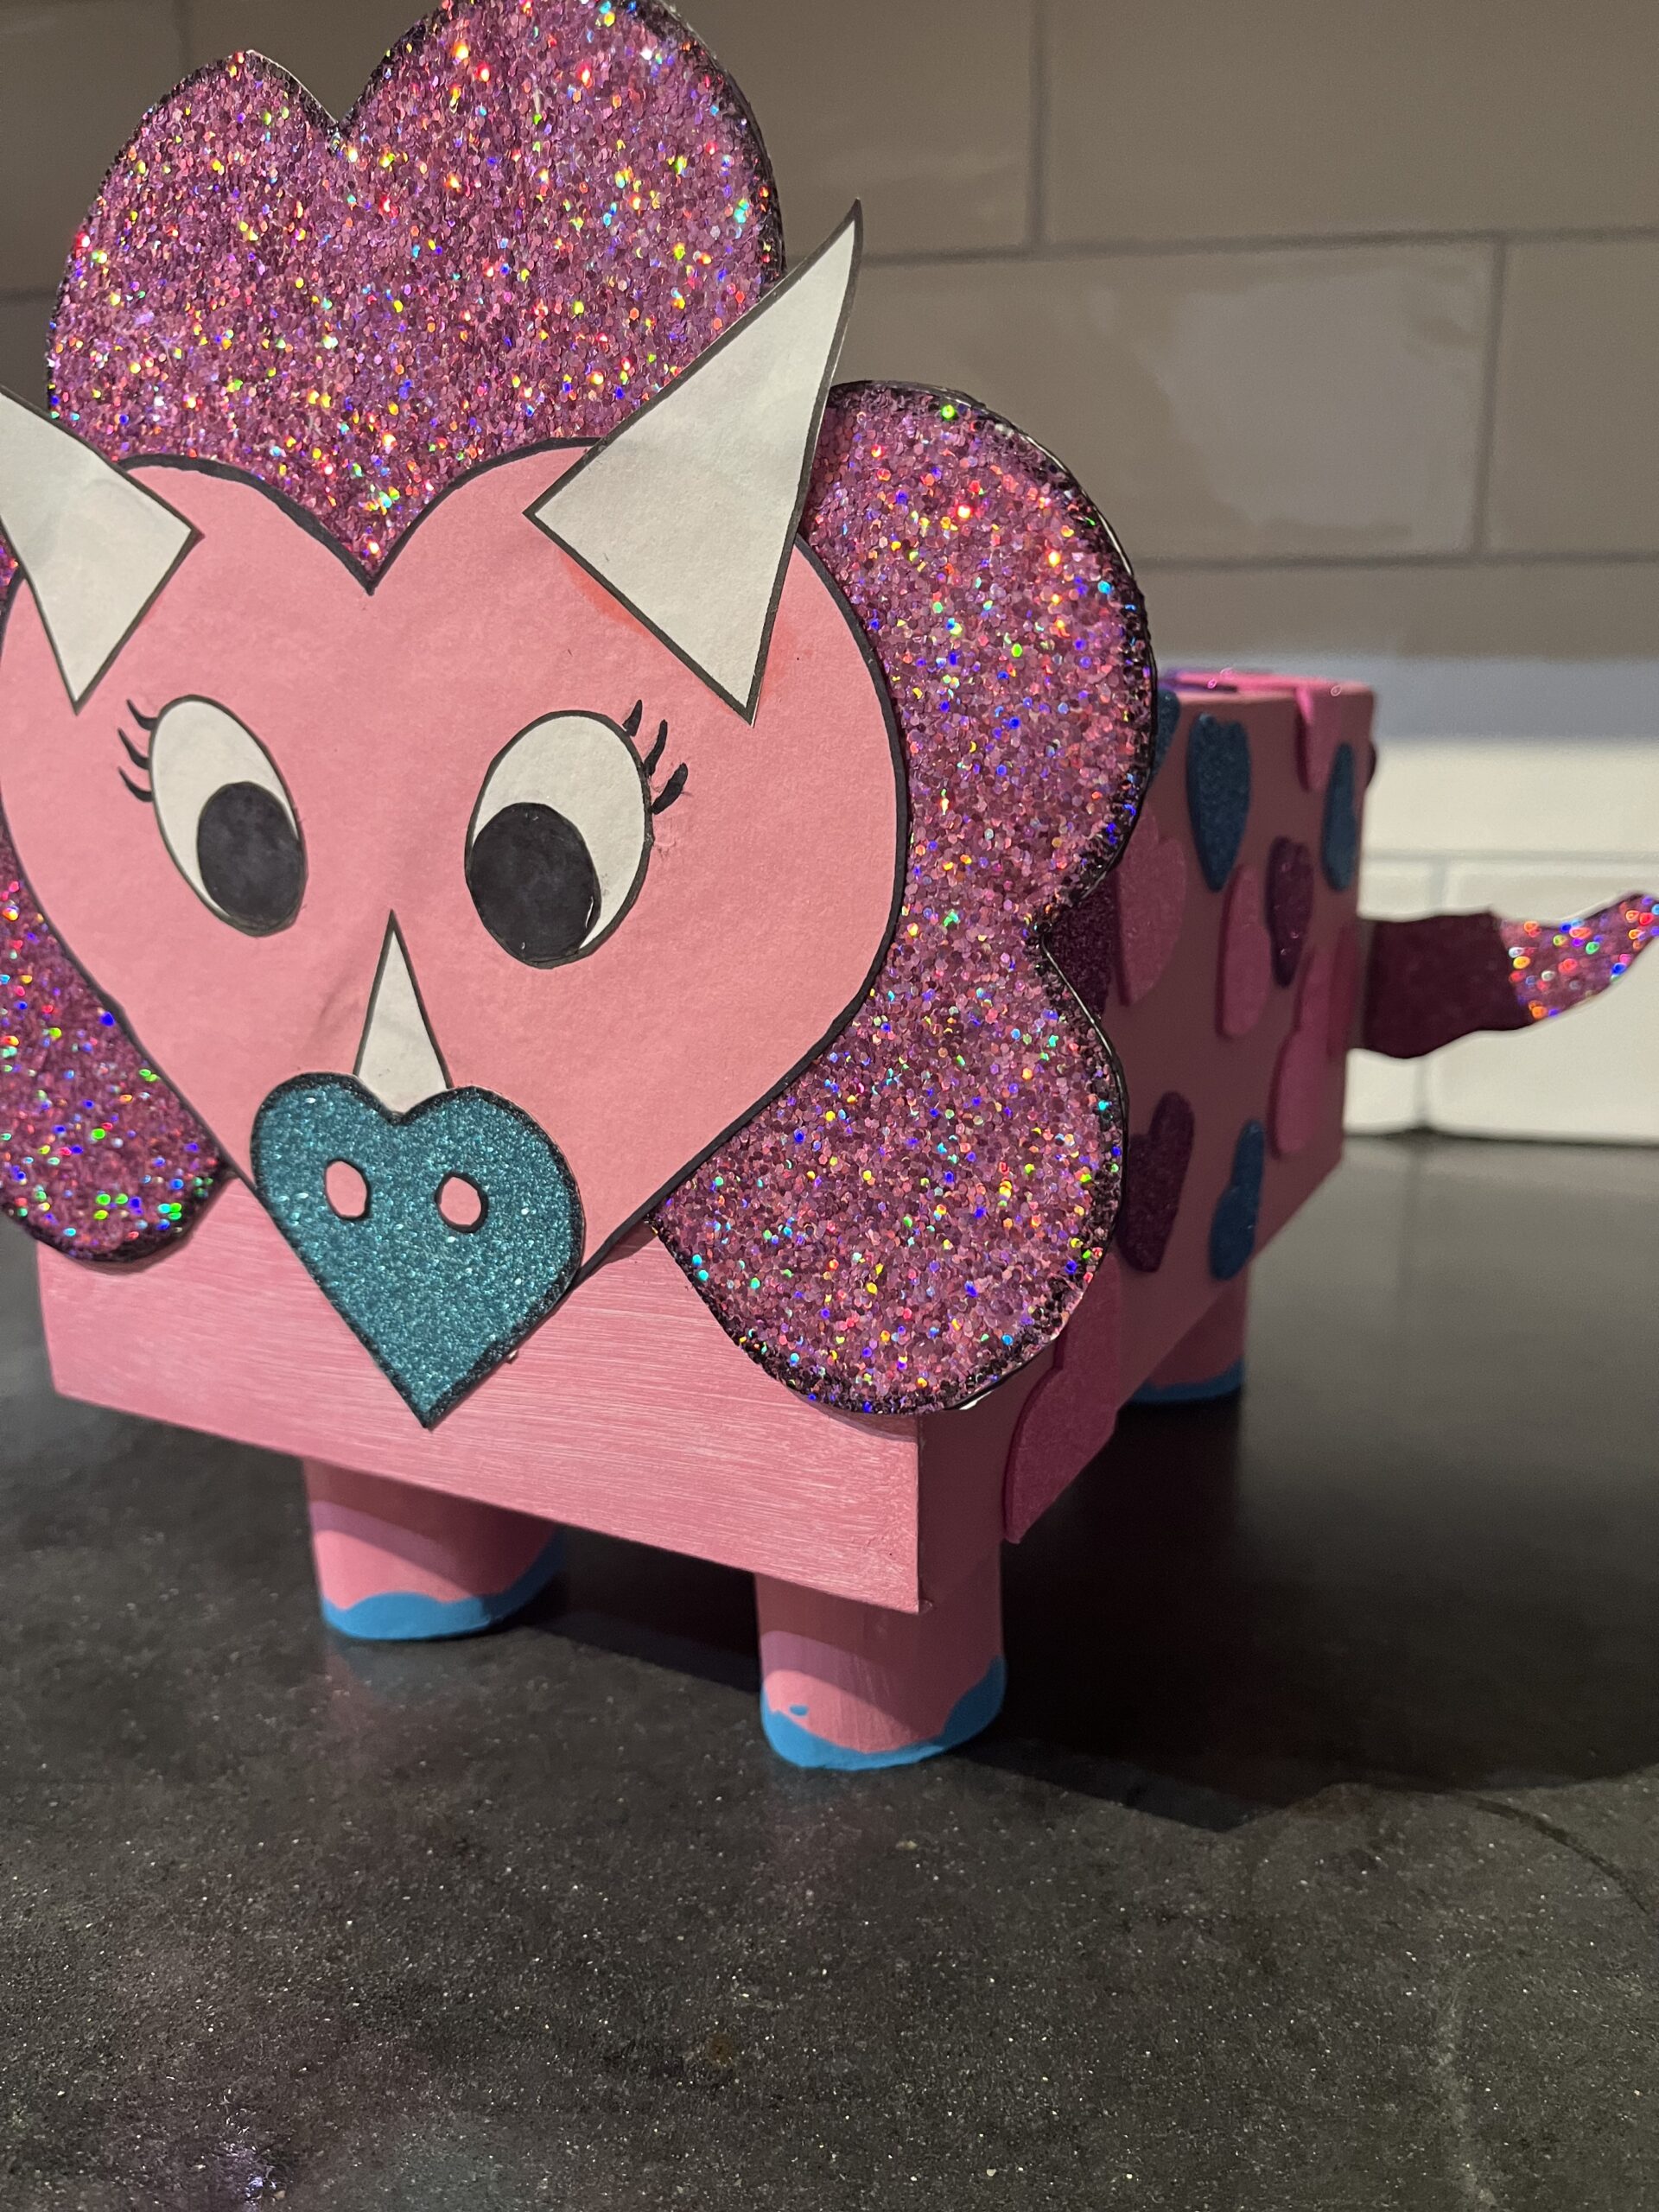
Evie’s favorite dinosaur is a triceratops, or a ‘ceratops’ according to Evie. One very early, sleepless morning later, I designed a triceratops face for her mailbox. Using only simple shapes (practicing that shape recognition) such as triangles, circles, ovals, and hearts, we created a cute triceratops design.
This post may contain affiliate links, which means I’ll receive a commission if you purchase through my links, at no extra cost to you. Please read full disclosure for more information.
The best part, it was SUPER easy to do. AND! You only need a couples of things. Before you start you should gather:
- Triceratops face stencil pieces (Free PDF template)
- A box
- Toilet paper rolls (I used two and cut them in half)
- Paint/paintbrushes
- Glitter paper/cardstock
- Heart stickers
- Glue
- Scissors

Putting together your Dinosaur Valentine’s Day Mailbox
For this project, Evie and I took a trip to our local craft store. I let her pick out two different pieces of scrapbooking paper. Evie being Evie went right to the glitter paper. I prefer thicker paper for this activity so that the head and tail can hold their form and not flop over. With the paper, paint, paintbrushes, and heart stickers; we spent less than $10 (the paper and stickers were 40% off)!
Next, print off the template and trace the shapes onto your desired paper. Evie and I loved talking about the shapes as I cut them out. I assembled all of the pieces with school clue, left it on my desk with a really heavy textbook on top of it.
While the triceratops face was drying, Evie and I started painting the body and the legs of our dinosaur Valentine’s Day mailbox. Depending on your box and the color of your dinosaur, you may want to paint your box white before putting on the color paint. Our paint was a thinner acrylic paint so even after we painted the box white, we still put down two coats of pink paint to get a solid pink color.
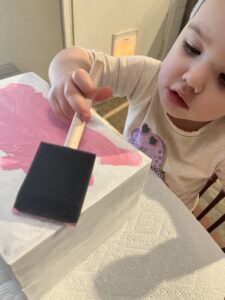
For the sake of easy painting, I waited until after the painting was done to cut a hole in the top of Evie’s box. A few cautionary words. If you have packing tape/labels on the outside of your box, it is possible that your paint will crack and flake off. I removed the tape and the labels, glued the box together on the open ends (thank you again ginormous textbook).
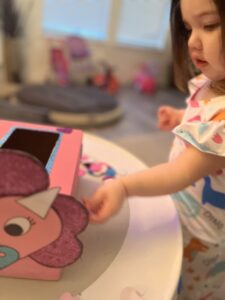
Once the paint was dry, I attached the triceratops face to the box. This way Evie would be deterred from placing stickers on this particular side of the box. I really didn’t want to peel them off again.
Next, Evie and I used glitter heart stickers as “scales” for our dinosaur Valentine’s Day mailbox. I pretty much let Evie place stickers wherever her heart desired, minus the side of the box with the face.
Lastly, I attached the feet and the tail using a hot glue gun. For the tail, I just freehanded a tail-like shape.
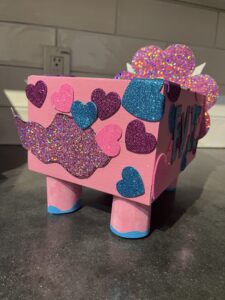
Overall, Evie loved making her “ceratops”. She spent the morning talking about making it and even informed our cashier at the craft store that she was making a dinosaur box. It was so much fun to make this with Evie and I’m so excited for her to bring it to class and share her creation with her friends!